
26 Feb What are Business Levels?
The Hasmate program uses “Business Levels” to help separate data for reporting and security.
Separating your data makes reporting more accurate.
Separating your data means that you can set up user logins, but for users to only see data appropriate to their part of the business. E.g. you can separate your data by branches, and then set up user logins for each branch manager to only see relevant data for their branch.
It’s best that this is set up before information is entered into Hasmate, as it will make things easier/faster.
What does the business structure look like?
Every business is different, and using Business Levels helps the Hasmate program suit your business better.
Have a think about what your business structure looks like? Do you have a number of locations, branches or departments? Think of the biggest way you can divide up your company – this is your Business Level 1.
Does your “Business Level 1” divide up further? If not, you don’t need to set up Business Level 2 or 3. If it does, then this will be your Business Level 2.
And so on for Business Level 3.
An example of a large business:
Say that you work for a national trucking company, with 12 branches throughout New Zealand. In each branch/location, there are several departments – e.g. dispatch, servicing, warehouse, etc.
In this example, Business Level 1 would be “Branch” or “Location”, and Business Level 2 would be “Department”. Business Level 3 is probably not needed.
An example of a small business:
Say that you own a small civil contracting business with 12 employees. With a business of this size, it might break down into departments, or it might not.
In this example, there are a couple of ways to set this up:
- Either, Business Level 1 could be “Department”, with Business Level 2 and 3 not needed; or
- Business Level 1 could be called “Business”, with Business Level 2 and 3 not needed. With this option, you don’t need to divide the business up at all.
Naming Your Business Levels
Click on “Master Files” on the main navigation, and then click “Control” from the dropdown navigation.
For more information about what each field in “Control” is for, click here.
Click the “Edit” button on the right hand side.
Scroll down to the three Business Level fields.
Fill in the field beside each of the appropriate Business Levels. The example below is based on the large business example above.
If you are using Business Level 2, make sure the “Business Level 2 Active” field is “Yes”.
If you are using Business Level 3, make sure the “Business Level 3 Active” field is “Yes”. In this example, we are not using Business Level 3, so it set to “No”.

Make sure you click “Save“. After you save any changes you make to “Control”, you will need to log out of the Hasmate program and then log back in to see the changes in effect.
Setting up Business Level 1
Now that you’ve named the Business Levels, it’s time to add the options for each.
Click on “Master Files” on the main navigation, and then hover over “Business Levels” from the dropdown navigation. You’ll now see the Business Levels names that you set up previously, e.g. Branch and Department.
Click on the first option, e.g. Business Level 1.
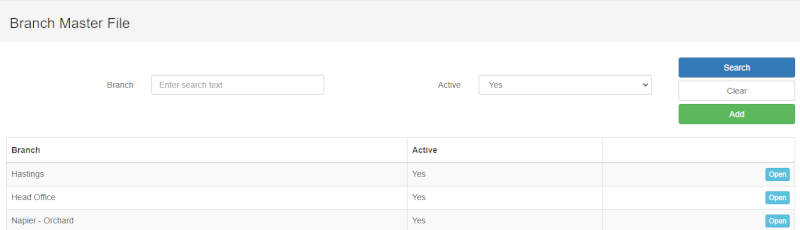
Click the green “Add” button on the right hand side.
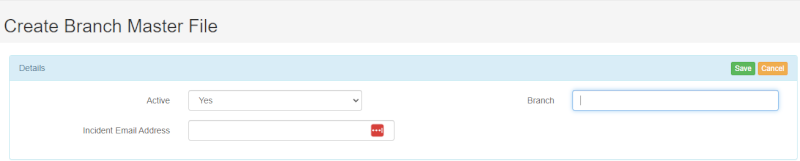
This section is made up of the following fields:
- Active – this is a “Yes”/”No” dropdown. This should be “Yes” unless you don’t want to use this Business Level option currently.
- Branch (or whatever you have called Business Level 1) – type in the name of a particular branch, e.g. Hastings, Napier, etc.
- Incident Email Address – for more information about this field, click here.
Make sure you click “Save“.
Repeat this process until you have added all your branch options, etc.
Setting up Business Level 2
Click on “Master Files” on the main navigation, and then hover over “Business Levels” from the dropdown navigation. You’ll now see the Business Levels names that you set up previously, e.g. Branch and Department.
Click on the second option, e.g. Business Level 2.
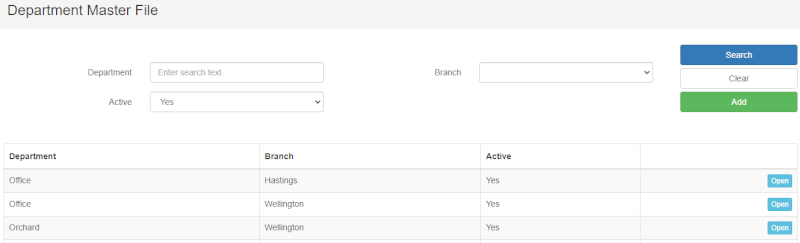
Click the green “Add” button on the right hand side.

This section is made up of the following fields:
- Active – this is a “Yes”/”No” dropdown. This should be “Yes” unless you don’t want to use this Business Level option currently.
- Branch (or whatever you have called Business Level 1) – this will be dropdown of the options you have set up for Branch. Choose the appropriate branch that this department is connected to. E.g. choose “Napier” if you are wanting to then add the “Sales” department for Napier.
- Department (or whatever you have called Business Level 2) – type in the name of a particular department, e.g. Warehouse, Office, Sales, etc.
The main difference is that you have to connect each new Business Level 2/Department to a Business Level 1/Branch.
Make sure you click “Save“.
Repeat this process until you have added all your department options, etc.
If you are using Business Level 3, this is the same process.
How to Make a Business Level Inactive
For more information on this, click here.
If you have further questions or require training on using the Hasmate program, please contact Hasmate.