
26 Feb Security Roles / Users
Once you have set up your Hasmate program, you will want to set up access for other members of your business – e.g. management, workshop manager, branch manager, etc. Using Security Roles and Security Users, you can control exactly what parts of the Hasmate program each user has access to, whether they can view, edit, and/or delete information, and also which Business Levels’ information they can see.
Scenario – you want to give access to the Hasmate program to other people in your business, but don’t want everybody to have Administrator access.
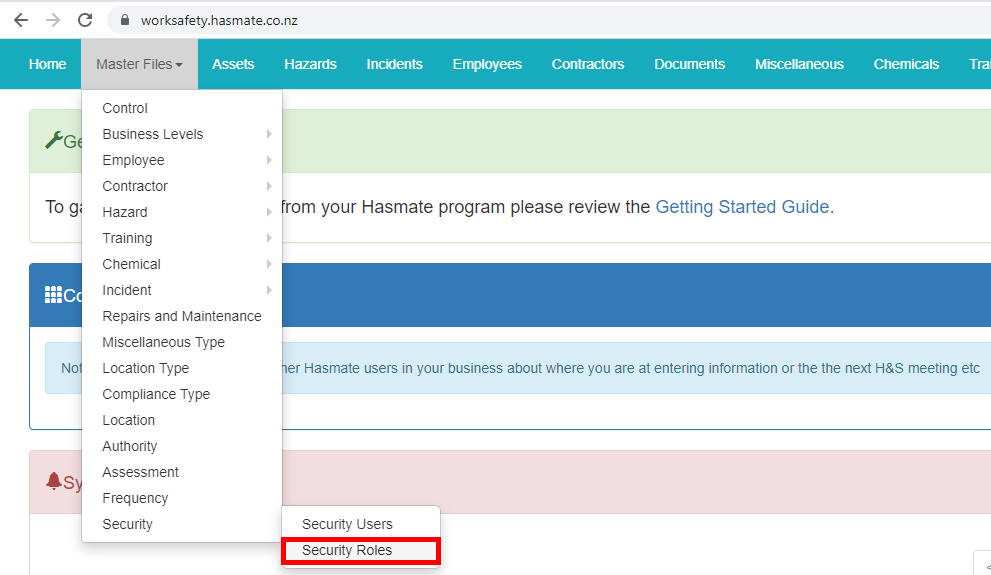
- Click on “Master Files” in the program menu, then go to “Security”, and then “Security Roles”.
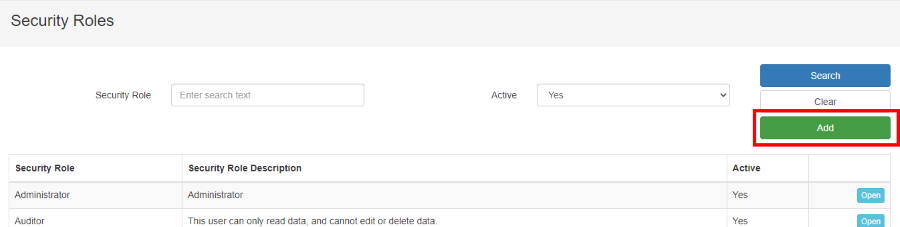
- We can now see what security roles are setup. Administrator is set up with access to everything, and is there by default. If you are using the program trial, your access is automatically Administrator. To create a new type of role, we click the green “Add” button.
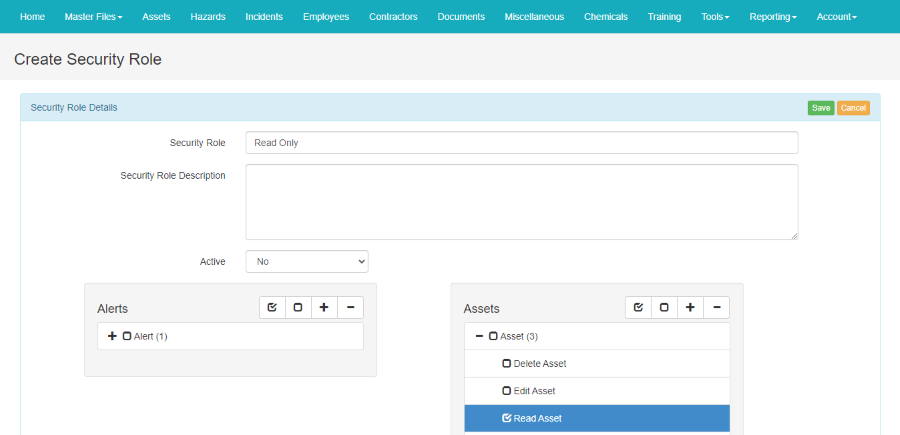
- We need to give the new role a name, and define the role’s capabilities. In the screenshot below, I’ve called the new role “Read Only” – you can name this anything “Management”, “HR Manager”, etc. Make sure the role is set to “Yes” for “Active”. Now we can choose what we want this role to be able to do, e.g. view only, edit, and/or delete data. We can then check everything we want them to have access to – e.g. if we only want this role to be able to view, edit and delete Assets, and not be able to access any other part of the Hasmate program, we would only check the three checkboxes under “Assets”. Once we have done this, click “Save”.
- The new security role is now set up.
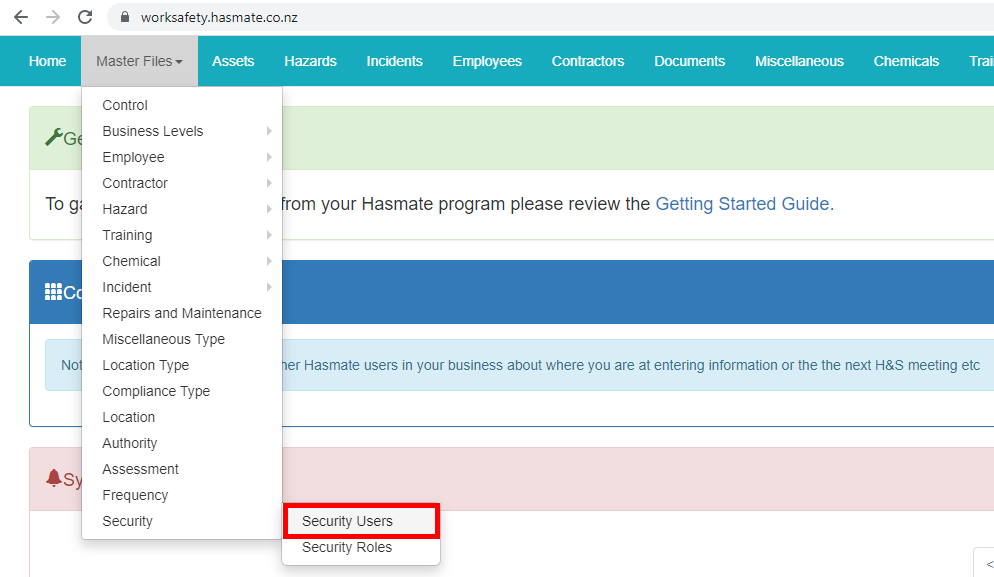
- We now need to set up access for particular users in our business. Click on “Master Files” in the program menu, then go to “Security”, and then “Security Users”.
- We can now see all users currently set up with access to the Hasmate program. To add a new user, click the green “Add” button.
- We need to fill in the following details to setup the new user:
- Security Role – choose the appropriate role from the dropdown, in this case “Read Only”
- Security Username – this is the user’s email address, and is used when logging into the program.
- Account Name – this will appear if the user contributes to the Forum, etc.
- Security Password/Confirm Password – this is used when logging into the program. Passwords must be a minimum of 8 characters. The password must contain at least 1 number, must contain at least 1 letter, and must contain at least 1 of the following !@#$^&*()_+
- Active – select “Yes” for all users. Selecting “No” will have the user setup in the system, but won’t let them login.
- Admin – select “No“. Only the main Hasmate administrator for a business should have this as “Yes“.
We can now restrict the user’s access to particular or all Divisions used in the Hasmate program. How Division is used depends on the business. If we only wanted the new user to be able to access “Hastings” data, we would click on the word “Hastings” from the “Available Division” column, and then click the “>” button, to move it to the “Assigned Division” column. If we wanted the new user to be able to access all Divisions, we would select the “?” button at the top of the “Available Division” column which will highlight all Divisions. Clicking the “>” button will move all Divisions to the “Assigned Division” column. Click the “Save” button.
- We can now see the new user set up. We can repeat this process for anybody else that needs setting up.